Monday, December 19, 2011

Let it snow, let it snow...

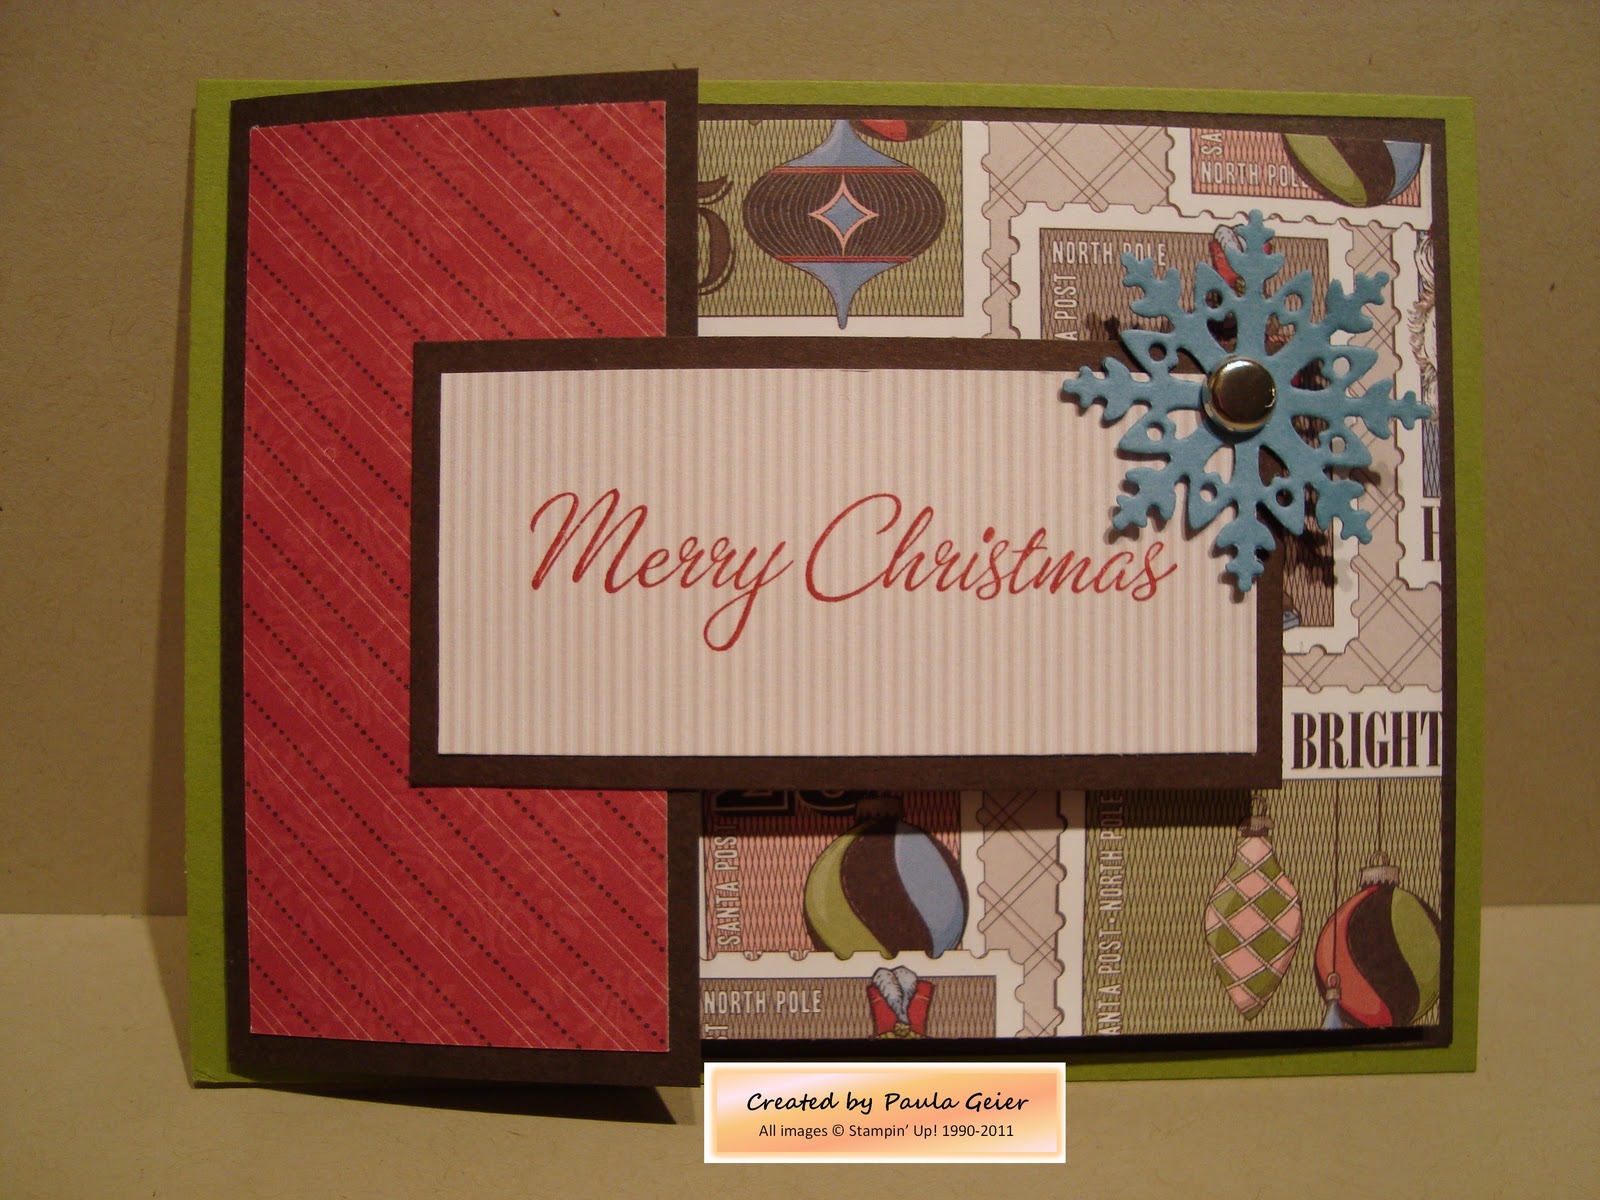
Only six days until Christmas, and we have no snow here in west central Minnesota. I don't like it. I don't mind the mild temperatures, but it sure would be a lot prettier with all the brown covered up by an inch or two of that sparkling white stuff! In my humble opinion, it's just not Christmas in Minnesota without snow. So, tonight I'm posting this card to help remind me of what snowflakes look like.

Recipe
Stamps: Teeny Tiny Wishes
Paper: Whisper White & Bashful Blue
Ink: Bashful Blue
Accessories: Northern Flurry embossing folder & Big Shot; Modern Label & Large Oval punches; Basic Rhinestones; sponge wedge, Stampin' Dimensionals

This is a super easy card to put together! Using the sponging technique, I lightly brushed an inked-up sponge wedge over the raised portions of the design to bring out the snowflake images. Then I lightly sponged around the snowflakes to give the background some depth.  I finished it off by popping the greeting up on Dimensionals and adding a couple of sparkly rhinestones.

Friday, December 9, 2011

Bright Hopes for Christmas

Only 16 days until Christmas! Time is flying by way too fast. Are you ready? If you don't have your Christmas cards started yet, here's another idea for you. This is another one of the sets that caught my eye immediately when I first saw the Holiday Mini Catalog. I just love the elegant look of the scrollwork images, and the style is similar to that of Norwegian rosemaling - another art form I really love!

Recipe
Stamps: Bright Hopes
Paper: Crumb Cake, Always Artichoke, Cherry Cobbler
Ink: Always Artichoke craft Stampin' Spot
Accessories: Iridescent Ice embossing powder & heat tool, Snow Burst embossing folder (Mini catalog) & Big Shot, piercing tool, Clear Rhinestone brad, Cherry Cobbler Seam Binding Ribbon, Stampin' Dimensionals

This card is simple enough that you could easily mass-produce quite a few at one time. The Snow Burst embossing folder adds just the right background texture, and I purposely separated the wreath and greeting images, as well as adding the contrasting color layers, to give the impression of a wreath hanging on the outside of a door. The Iridescent Ice gives the wreath an icy sparkle, and of course the bow (done the easy stampercamper way) is the perfect finishing touch.

It's been a long and busy week, and I'm ready for some serious relaxation this weekend - in between finishing my Christmas shopping online and doing some more holiday decorating! Hope your weekend is just as sweet!


Tuesday, December 6, 2011

The Sounding Joy

This is the third project that my stamp club made at our last get-together. This was one of the first sets to go on my wish list when the Holiday Mini catalog came out. As an organist, Christmas is my very favorite season of the year...all those beautiful hymns sung from the heart by a congregation while the candlelight flickers throughout the church. "Joy to the World" is one of my favorite hymns, and I just love to pull out all the stops and just let the music soar! I was inspired by a lovely card made by Jen Sannes, and changed up the colors and layout to better suit my taste.

Recipe
Stamps: The Sounding Joy (Holiday Mini)
Paper:  Cherry Cobbler & Very Vanilla CS (stamp club used Shimmery White and it was beautiful!), Early Espresso textured & smooth CS; Silver Glimmer paper
Ink: Crumb Cake, Cherry Cobbler
Accessories: Big Shot, Petals-a-Plenty embossing folder, Tasteful Trim die, 3-1/2" circle die, Cherry Cobbler Quilted Satin Ribbon (mini catalog), piercing tool, Clear Rhinestone brad, Basic Rhinestones, Sticky Strip, Stampin' Dimensionals

The assembly of this card is pretty self-explanatory. The only tip I have is to use Sticky Strip to adhere the Cherry Cobbler to the Silver Glimmer paper, as regular adhesive just isn't sticky enough. I also used a dull scissor to clip off the tip of the brad that was showing on the top outside of the circle. The bow is, of course, made the stampercamper way...refer to previous posts for instructions.

That's all for tonight, as it's past my bedtime and I have a busy week ahead of me. Hope to see you again in a few days, and until then, keep it sweet!

Wednesday, November 30, 2011

Merry Giftmas!

I'm sorry to report that there was trouble in blog land last night, and due to circumstances beyond my control I was unable to get this project posted. Thankfully all is well tonight, so here we go!
 
This is another project that my stamp club made last week. I don't really know how to classify this one: it's a card with unique folds that holds a gift card, so I guess I'll call it a Giftmas card!

Recipe
Stamps: Four the Holidays, Many Merry Messages
Paper: Old Olive, Early Espresso, Marina Mist & Whisper White CS; Letters to Santa DS paper
Ink: Riding Hood Red
Accessories: Northern Frost decorative strip die & Big Shot; 5/16" Jumbo Brads Neutrals; 3/4" circle punch; paper piercing tool

You will need:
  1. Old Olive CS cut to 5-1/2" x 4-1/4"
  2. Early Espresso CS cut to 7-1/4" x 4", score at 2"
  3. Whisper White CS cut to 8-1/2" x 3-3/4", score at 3-1/2"
  4. Designer Series paper (RHR diagonal stripes) cut to 3-3/4" x 1-3/4" for left front
  5. Designer Series paper (postage stamp images) cut to 3-3/4" x 3-1/2" for right front
  6. Early Espresso strip cut to 3-1/2" x 1-3/4" for front greeting layer
  7. Designer Series strip (Crumb Cake stripes) cut to 3-1/4" x 1-1/2" for front greeting
  8. Designer Series paper (Old Olive diagonal stripes) cut to 3-3/8" x 2-1/2" to hold gift card
To assemble:
  • Adhere Early Espresso piece to Old Olive base with fold at left.
  • Adhere Whisper White piece to Early Espresso piece with fold at right.
  • Adhere RHR rectangle to left front Early Espresso piece.
  • Adhere postage stamp images piece to front fold of Whisper White piece.
  • Punch a half circle out of the top of the Old Olive diagonal stripes piece and adhere to inside right of the Whisper White CS.
  • Stamp greeting on Crumb Cake stripes DS paper with Riding Hood Red.
  • Adhere greeting to strip of Early Espresso and adhere EE strip to left fold of card front.
  • Use the Northern Frost die with Marina Mist CS in the Big Shot to cut a variety of snowflakes.
  • Punch a hole in the upper right corner of the greeting strip and add your choice of snowflake to front using a brad.
  • Stamp a greeting inside your card, and you have a unique way to give a gift card! I did use Velcro dots on the back side of the greeting strip to hold the card closed.
These make great little gifts for teachers and other special people, and you can vary the Designer Series paper you use to make them appropriate for any occasion. Now go and create your own Giftmas card - well, not right this minute...unless you're an insomniac!


Friday, November 25, 2011

Telescoping Christmas

No, my computer didn't crash, and I didn't forget my blog password. Between work and taking advantage of the beautiful November weather to finish up a lot of painting both outside and inside the house, I've been very busy! To make up for those lost three weeks in blog land, I'll be posting lots of Christmas cards in the next few weeks.

The first is one that my stamp club really enjoyed making last week. It's called a telescoping card, and it's actually very easy to put together. I received some Marina Mist Scallop Dots Ribbon from my upline (along with some other goodies) as a reward for meeting a selling goal, and when I opened up the ribbon it immediately sparked the idea for this card. Using my trusty Color Coach as a guide, I paired it with Real Red and Old Olive for a unique and interactive Christmas Card!

Recipe
Stamps: Bright Hopes (Holiday Mini)
Paper: Marina Mist & Whisper White CS
Ink: Marina Mist & Real Red classic ink pads, Old Olive craft pad
Accessories: Big Shot & Scallop Circle, 3-1/2" Circle & 3" Circle dies; 2-1/2" Circle punch; Word Window punch; Iridescent Ice embossing powder; heat tool; paper piercing tool; Circle Fire rhinestone brads; Basic Rhinestones; Silver brads

You need one Marina Mist scallop circle, two 3-1/2" Whisper White circles, one Marina Mist 3" circle, and one 2-1/2" Whisper White circle. Using the Old Olive craft pad, stamp the wreath image on the smallest circle and the Christmas tree on one of the 3-1/2" circles, sprinkle Iridescent Ice embossing powder on both and then heat emboss. On the remaining 3-1/2" circle stamp the "Wishing you a season..." greeting in Real Red and the snowflakes around the outside in Marina Mist. Adhere the Christmas Tree image to the Marina Mist scallop circle and the wreath image to the small Marina Mist circle.

To assemble the card, take the 'greeting' circle, lay it upside down (so you can see the words but they are upside down) over the Christmas Tree image, pierce a hole in the 'top' center of the white circle (actually the bottom of the circle but it's upside down!) and insert a silver brad. Now you can swing the 'greeting' circle up so you can read the words. Then take the wreath circle and center it over the 'greeting' circle, punch a hole in the Marina Mist margin at the top center and insert another brad. Swing the wreath image up to add the ribbon. Fold a 4" piece of ribbon in half and punch a hole in the bottom center with the 1/16" circle punch. Using the piercing tool, punch a hole in the top center of the wreath and insert the Circle Fire brad, then push the brad through the hole in your ribbon. To 'close' the card, hold near the ribbon and swing to the right and down until the circles line up neatly inside each other. You have just made a telescoping card!

To finish off the wreath image, stamp "Merry Christmas" in Real Red on a scrap of 5/16" wide Whisper White paper. Hold your Word Window punch so you are looking at the back, insert one end of the scrap into the right side of the punch opening, and punch off the square end. Turn the scrap and finish off the other end the same way, and adhere over the center of the wreath using Stampin' Dimensionals. To add a bit more color to the wreath, I colored our basic Rhinestones using a red Sharpie marker and then adhered them in a random pattern.

Isn't this a neat idea? You could also change things up a bit and add a family photo in the bottom circle instead of the tree. I'm afraid my photos don't capture the real sparkle of the Iridescent Ice; it looks much better in real life!

Well, that's it for this week - I'll see you next Tuesday with another sweet Christmas idea!

Sunday, October 30, 2011

Mixed Up Scandinavian!

Yes, if you didn't know this before, I'm here to admit that I am one mixed-up Scandinavian.  It's Halloween tomorrow, but since I don't do cards for that holiday I'm posting a Christmas card instead!

A few weeks ago the country church I attend held a Lutefisk Supper, complete with all kinds of Scandinavian goodies and a Scandinavian Gift Shoppe. I made these Christmas cards for the gift shop and was quite pleased to have people ask me how I made them; apparently they were a big hit with those craving all things Scandinavian! I tried to keep the embellishments to a minimum in order to keep the postage cost down for those sending these out for the holidays.

Recipe
Stamps: Scandinavian Season (retired)
Paper: Early Espresso, Cherry Cobbler, Old Olive & Shimmery White CS
Ink: VersaMark, Early Espresso, Cherry Cobbler, Night of Navy & Old Olive stamp pads; Old Olive marker
Accessories: Black embossing powder, blender pens, Basic Rhinestones, paper piercing tool, Stampin' Dimensionals

I stamped the tree with VersaMark on the Shimmery White CS and then heat embossed it with black embossing powder. I colored in the tree using ink pads and blender pens. Since the Olive coloring turned out so light, I used the marker to add some shading. (Be sure to carefully blot the embossed parts after using the marker, as it tends to smear.) I added some rhinestones for sparkle, and then finished it off by piercing my paper to give it a Hardanger crochet look.

Well, that's it for tonight. Hope I see some trick-or-treaters tomorrow night...I DO have some sweet treats!

Tuesday, October 18, 2011

It's a Wrap Card!

Last week I posted a cute little Halloween treat box that used the stamp set "It's a Wrap Holidays" from the Holiday Mini Catalog. I stamped the "EEK!" from that stamp set on a mailing label and wrapped it around a Hershey's Nugget candy. Well, that set is not only for stamping on mailing labels - you can also use the images to make backgrounds or really sweet cards, like this one!

Recipe
Stamps: It's a Wrap Holidays (mini catalog)
Paper: Soft Suede, More Mustard, Pool Party & Very Vanilla CS; Spice Cake Designer Series paper
Ink: Soft Suede, More Mustard & Pool Party stamp pads
Accessories: Scallop Edge border punch, 3/4" circle punch, Glimmer Brads Basics, Spice Cake Designer Fabric, Stampin' Dimensionals

Have I mentioned yet how much I love the color combinations in the Spice Cake papers? And the matching fabric makes the perfect bow! I did the bow the Mary Brown (aka stampercamper) way and double-folded it, then clinched it up in the Glimmer Brad. I put the brad through a circle of Soft Suede and mounted it to the card front using a Dimensional. Isn't it cute?

Well, that should wrap it up for tonight...have a sweet one!

Saturday, October 8, 2011

Sweetly Scary

I have a confession to make: I'm not a big fan of Halloween. Yeah, I like handing out candy to the neighborhood kids when they come by in their scary-cute costumes. But as for making cards celebrating the holiday? Nope, just don't see the reason. But since I do like to hand out candy, it stands to reason that I like to come up with interesting ways in which to wrap that candy!

This is the last of the three projects made by my Stamp Club last week. It's a simple Halloween treat box filled with Hershey Nuggets. Of course I didn't have any Halloween Designer Series paper, but the Well Worn packet had the perfect substitute.

Recipe
Stamps: Grateful Greetings, It's A Wrap Holidays (mini catalog)
Paper: Basic Gray, Cajun Craze, Well Worn Designer Series paper, mailing labels
Ink: Basic Gray, Cajun Craze
Accessories: Big Shot & Bitty Box die, 8-blossom punch from Itty Bitty Shapes Punch Pack

Tuesday, October 4, 2011

"There's Always Something...

for which to be thankful." I love that quote by Charles Dickens, and it's the main reason (well, okay, I loved the images too!) that I ordered the Always Thankful set in the Holiday Mini Catalog. Being the parent of a special needs child means that your whole concept of a normal life changes. You learn that even though there may be things your child is unable to do, there are so many others that he excels at. You learn that you don't need all those things you once thought you needed in order to be happy. You celebrate the small victories, and you realize that each new day brings another opportunity for growth. Yes, Jayson has Asperger's, but he doesn't have brain damage. We are all healthy. I have three different jobs, and I love them all. I have family and friends that I know I can count on to be there when needed. There is ALWAYS something for which to be thankful!!

This is the other card that my Stamp Club made last week. In keeping with the theme that "It's All About the Paper!" we used two more of the patterns from the gorgeous Spice Cake patterned paper. We also incorporated the matching Spice Cake fabric into the card - love that stuff! It's so easy to work with, and you get quite a bit of material in 3 different patterns/colors - those fat quarters are pretty fat!

Recipe
Stamps: Always Thankful
Paper: Spice Cake Designer Series paper; Soft Suede, Pool Party & Vanilla CS
Ink: Basic Black, More Mustard & Pool Party stamp pads; River Rock & More Mustard markers
Accessories: Spice Cake Designer Fabric; Scallop Oval, Modern Label & 1-3/8" Circle punches; Mini Library Clips; Blender Pens; Stampin' Dimensionals

The wheat image was stamped with Basic Black. I then made a "pool" of color on the inside top of my stamp pad case by repeatedly pressing the top down into the pad and then opening the case. I used a blender pen to pick up ink from that pool to color the image, which enables you to shade the image as you desire. I used the MM marker add some deeper shading to the wheat, and colored the grass with River Rock. The quote was stamped on vanilla CS, then punched out with the oval punch. I punched a circle out of Soft Suede and adhered that to the back of the oval. I punched another piece of Soft Suede with the Modern Label punch and then cut that piece in half, and adhered one half to each side of my quote behind the circle. I finished it off by clipping a short piece of fabric in the Library Clip and clipping it to the quote, then added Dimensionals to the back and adhered it over the fabric strip running along the right third of the card. To adhere the fabric strip, I simply ran adhesive from top to bottom along the right edge of the brown patterned paper, then simply stuck the fabric to the adhesive. Easy peasy!

Well, I'm thankful that I finished this post and can now go to bed. What are you thankful for? Remember, there's always something!!

Monday, October 3, 2011

BTGO!

I bet you're scratching your head, wondering what in the world that means! That's what I did the first time I saw BOGO on a sales flyer. It took me a while (don't forget I'm a 50+ blonde Norwegian) to figure out it meant Buy One, Get One! Well, Stampin' Up! has a great deal this month on the Simply Sent Kits: Buy Two, Get One coordinating stamp set free!!

The kits are found on pages 192-193 in the big catalog, and the coordinating sets are right next to them. You can order two of one kit plus the coordinating stamp set, or mix and match different kits and one stamp set. The Simply Sent Kits offer a variety of basic themes, so it's easy to create cards for any occasion. This is the perfect option for beginning crafters, as well as those of you who think you have no time to make your own cards. You can grab any Simply Sent kit, some adhesive and your scissors, and have eight cute cards in a short amount of time. Imagine getting a bunch of cards done while you're waiting at the doctor's office! Scout troops and other organizations would also benefit from a quick and easy craft project. These kits also make fabulous stocking stuffers (hint, hint)!

While the kits make 8 cards each, you'll have the stamps and leftover embellishments (Stampin' Up! is very generous with the supplies in these kits) to use on other projects. AND you can purchase "refill" kits any time throughout the catalog year. It's all about convenience!  To order, just click on the link on the right side of the page to go to my shopping website. While you're there, check out the holiday items on the UPDATED Clearance Rack - there's some great bargains to be had! But hurry, things are selling out fast!

Tuesday, September 27, 2011

Spice Takes the Cake!

Have I mentioned yet how much I LOVE the Holiday Mini Catalog? There are so many neat products in there that I had an awfully hard time trying to be frugal and practical when placing my first order! The first thing that went on my order was the gorgeous Spice Cake Designer Series Paper. I just love the color combinations in the paper (Soft Suede, More Mustard, Pool Party, Pear Pizazz, River Rock, Very Vanilla), and the patterns are generic enough that the paper can be used all through the year.

For that reason, the theme of this week's Stamp Club was "It's All About the Paper!" We did three projects with a fall theme that used Designer Series Paper as the main focus: two cards and a Halloween treat box. The card I'm posting tonight uses four different patterns of paper and showcases how you can use patterned paper in ingenious ways! It's also a great layout for using the new Peekaboo Frames die, also in the mini catalog.

Recipe
Stamps: Day of Gratitude
Paper: Spice Cake Designer Series paper; Very Vanilla, Pool Party & Soft Suede CS
Ink: Soft Suede, More Mustard & Pear Pizzazz
Accessories: Peekaboo Frames Bigz L Die & Big Shot, Modern Label punch, Basic Pearls, Stampin' Dimensionals, 2-Way Glue Pen

Hey, you don't need ribbon when you've got this fabulous patterned paper! I just cut a strip to use as a ribbon-like accent across the middle of my card. To decorate the Peekaboo Frame, I simply cut along the dotted lines of the pattern in another of the papers and adhered to the front. I added the tiny pearls as some bling - they were the perfect size to fit in the flowers. I then cut a rectangle of vanilla CS and stamped a Thanksgiving greeting, and glued it to the back of the Peekaboo Frame before adhering it to my card front with Dimensionals. This would also make a nice birthday card, and I'm going to be using this layout for some Christmas cards as well!

The Peekaboo Frames die is designed to coordinate with the 25 & Counting stamp set to create a personalized Advent calendar, but it works so well on this type of card, too! It has five different size/style frames on one die, and would be a great addition to your crafting supplies! To see what other fabulous products are in the Holiday Mini Catalog, just click on the link on the right side of this page.

Have a sweet time stamping!

Friday, September 23, 2011

Happy Fall!

The first day of fall...hard to believe that summer has come and gone already; although here in Minnesota it seems we had about six months of spring and only a few weeks of summer! We are supposed to get some Indian Summer next week, and I hope the forecasters are right, as I'd really like a few more warm days before we have to start getting ready for what is projected to be a cold and snowy winter. Again.

So I mentioned that I've not been feeling the greatest for the past week or so. I don't know about you, but when I'm feeling under the weather, my brain just doesn't work the same. I've had no mojo, and any creativity floating around upstairs got lost in the flood of sinus congestion and eventually ended up in my Kleenex, I swear. But, since I have a hard time just laying around, I did spend a lot of time in my craft room trying to keep myself occupied. I spent some time playing around with one of the sets in the Holiday Mini Catalog, Always Thankful, and here is one of the cards I came up with. I just LOVE the color combinations in the Spice Cake Designer Series paper; you can expect to see more projects using that gorgeous paper soon!

Recipe
Stamps: Always Thankful
Paper: Spice Cake Designer Series paper; More Mustard, Soft Suede & Vanilla CS
Ink: Soft Suede, Pear Pizzazz & More Mustard markers, Pear Pizzazz & Pool Party pads
Accessories: Top Note die & Big Shot, Large Oval punch, Pool Party ruffled ribbon, Ice Circle rhinestone brads, sponge wedge, Stampin' Dimensionals


Tuesday, September 20, 2011

Simply Worn Out...

is a description that fits me perfectly right now! For the last couple weeks I've been coming home from my day job, changing clothes and going outside to work on finishing my big landscaping project. By last Wednesday I only had a few blocks left to stack...a great feeling! Since we hadn't gotten a vacation in this summer, I had taken Friday and Monday off work, planning on getting a last camping mini-vacation in over the weekend. Then on Thursday morning I woke up with a very sore throat. By Friday I was coughing, and by Saturday I was running a temp and seriously worried about coughing one of my lungs out. Needless to say, the camping weekend got scrapped. Yesterday, when I was finally able to get in to see a doctor, she took one look at my throat and put me on antibiotics. I haven't gotten a good night's sleep in almost a week, and I'm just plain worn out.

So, I'm posting two simple cards using the fabulous Well Worn Designer Series paper paired with the Designer Frames embossing folders. These will work great for "manly" birthday cards, which I always have the hardest time designing.

Recipe
Stamps: Occasions Alphabet, Simple Salutations
Paper: Crumb Cake CS, Early Espresso textured CS, Well Worn DS paper
Ink: Early Espresso
Accessories: Regals brads (the Not Quite Navy ones are from my stash of retired brads)

The first card uses my new favorite "go-to" layout for a quick card, which uses the oh-so-versatile Occasions Alphabet. By changing up the patterned paper and color schemes, you can create a large variety of cards for different occasions in a very short period of time. Remember my newlywed card? Same layout!

For the second card, I just turned the layout around a bit to fit a vertical orientation.

The Well Worn patterned papers feature Not Quite Navy, Cajun Craze, Early Espresso, River Rock, Soft Suede & So Saffron...great colors for your upcoming fall card making!

I HAVE been able to play with some of my new stuff from the Holiday Mini, and hope to be able to share some of that later this week. For now, I'm off to bed, and sincerely hoping for some sweet dreams tonight!

Thursday, September 1, 2011

Playing Catch Up!

I've been awfully busy the last few weeks, as is very evident by my lack of posts lately. So tonight I'm playing catch-up! I'm lucky in that I have a TV in my craft room, not far from my laptop, so I'm multi-tasking tonight by doing my blogging while I watch the Minnesota Vikings in their last preseason game. I am a huge Vikings fan, so I'll apologize in advance to those of you who don't care for football, as I will probably be expressing my love of them many times during the upcoming football season!


Tonight I'm sharing the other two cards that our stamp club made last month. It's a great coincidence that the first card is purple, my favorite color during football season! ; ) It's the lovely Field Flowers stamp set paired with Wisteria Wonder. The second card is a fun summertime sampling of creative ways to use your punches (CASE'd from a card by Lisa Young). Enjoy!

Recipe #1
Stamps: Field Flowers, Teeny Tiny Wishes
Paper: Wisteria Wonder, Elegant Eggplant & Whisper White CS, 2011-2013 Patterns Designer Series Paper Pack
Ink: Wisteria Wonder, Elegant Eggplant, Lucky Limeade
Accessories: Oval Scallop Frame die, Stripes embossing folder & Big Shot; Lace Ribbon Border, Modern Label & Word Window punches, Rhinestone Brad, Basic Pearls, White Taffeta ribbon, paper piercing tool, Stampin' Dimensionals

Recipe #2
Stamps: On Your Birthday, Woodgrain
Paper: Crumb Cake, Wild Wasabi, Peach Parfait, Blushing Bride, Early Espresso & Whisper White CS, Just Add Cake Designer Series paper
Ink: Crumb Cake
Accessories: Cupcake Builder, Petite Pennants Builder, Large Oval, XL Oval, 1/2" Circle & 3/16" Corner punches; Square Lattice embossing folder & Big Shot; Basic Rhinestones; Stampin' Dimensionals

Well, that was good timing: the game is over, the Vikings won 28-0, and I got my posting done. Oooops! I almost forgot to mention that the Holiday Mini Catalog went live today! I'm so excited, as this is the first mini catalog in many years where I've wanted to order just about everything inside! You can view it by clicking on the link on the right side of this page. If you would like to schedule a workshop and earn some of the mini catalog items for FREE, just send me an email at sweetp563@hotmail.com. Sweet dreams!

Wednesday, August 10, 2011

Sunset Sails

We've been having a run of beautiful weather here; I hope I'm not jinxing things by saying that! The humidity has been down in the bearable range with mostly sunny skies, cooler evenings and absolutely gorgeous sunsets. On the flip side, the newspapers are full of back-to-school sales, which means summer is coming to an end, almost before it began! I tried to capture the feel of a beautiful summer evening on this card, which was one of three summer-themed cards that my stamp club made this week. I used the fabulous Sail Away a la carte (single) stamp from the Summer Mini catalog, which is only available to order until August 31st. The use of lighter colors, reverse masking and lots of white space gives the card an airy feel, reminiscent of sunset sails on the lake.

Recipe
Stamps: Sail Away, Sincere Salutations
Paper: Baja Breeze, Not Quite Navy, Calypso Coral & Whisper White CS
Ink: Jet Black Staz-On, Baja Breeze, Daffodil Delight, Calypso Coral & Not Quite Navy stamp pads
Accessories: Scallop Oval Frame die & Big Shot, 1/2" circle punch, Silver Mini Brads, 5/16" white Jumbo Brad, Daffodil Delight 1/8" taffeta ribbon, white Baker's Twine, paper piercing tool, sponge wedges, Stampin' Dimensionals

I first stamped the sailboat image in the right lower corner of my card front using black Staz-On. I ran the Scallop Oval Frame die through the Big Shot; it die cuts both an oval and the frame surrounding it. I used the frame portion as a mask, applying some repositionable adhesive to the back and then centering the frame mask on my card front. I then applied a mask over the sails; to make the mask, I stamped the sailboat image on Post-It note paper and cut out the sails, then stuck that Post-It mask over the stamped sails on my card front. Then I used another piece of Post-It note paper to mask off the top portion of the oval, and sponged Baja Breeze inside the oval frame on the bottom third of my card to represent water. I then moved the Post-It note mask to cover the "water" I had just sponged, and sponged the "sunset" using Calypso Coral on the top and Daffodil Delight near the water. The key to successful sponging is to use a light hand; applying too much pressure gives you dark blotches, while lightly sponging allows you to achieve a more blended look. I started the Calypso at the top and sponged down, applying less pressure as I got to the middle. Then I sponged the Daffodil beginning at the water line, and worked my way up and into the Calypso, overlapping the two colors a bit in the middle to more thoroughly blend them. When I pulled all the masks off I had a beautiful "sunset on the lake" oval! I also used my scallop frame as a template for the brad holes: I punched three evenly spaced holes in the lower left portion of the frame, and used the template to make sure I pierced evenly-spaced holes in my card front. I used three of the new mini brads to add a somewhat "nautical" look, and then layered the white card front onto Calypso, and then Not Quite Navy cardstock, and stamped the greeting in NQN ink. Once I had the layers together, I punched about a three-quarter circle out of all the layers in the upper right corner using the circle punch, and then used Dimensionals to attach the layered card front to the Baja Breeze base. I used the paper piercing tool to punch a hole in the circle cutout, wrapped the taffeta ribbon around the white brad and inserted it through the Baja base. To finish it off,  I tied some Baker's Twine around the ribbon and knotted it. I can't claim total credit for this idea, as I got it from a beautiful card on splitcoaststampers by Angela Helynck, tweaking it a little to fit my needs.

Doesn't this make you want to go sailing at sunset? I'm going to go sailing, but it's sailing off to bed instead! Sweet dreams!

Friday, August 5, 2011

Sharing some Calypso love!

Sorry that it's been so long since I've been able to post...my life has been very busy lately! Had to get ready for my combination Stamp Sale/New Catalog Open House last weekend; I didn't think I had all that much discontinued stuff to get rid of, but turns out I did. Then Mother Nature decided that some of us in central Minnesota needed to experience the land-locked version of a hurricane this last Monday - what an experience that was! We didn't lose any trees, but every square foot of our 1.5 acre lawn is covered with leaves and branches. So now I've got the thankless job of picking up sticks so that we can mow the lawn before it's a foot high. I decided to approach it like a crime scene, and do a grid-by-grid search. So far it's working, but the mosquitoes have figured out my strategy and are laying in wait for me. I hope they're considered protein, because I swallowed a few tonight! Oh well, hopefully I'll have things ship-shape again by Sunday so we can fire up the mowers again!

This card is the first I've made using the new set Field Flowers. This beautiful set was the first to go on my wish list on my first pass through the new catalog. The flowers are so detailed they almost look real, especially when you do the two-step stamping with coordinating colors like I did. I also had to try out the new Lace Ribbon Border punch, and I just love it - as well as Calypso Coral, one of the new 2011-2013 In Colors!

Recipe
Stamps: Field Flowers
Paper: Calypso Coral, Basic Gray & Very Vanilla CS, Calypso Coral from the Patterns Designer Series Paper Stack In Color Assortment
Ink: Calypso Coral, Riding Hood Red, Lucky Limeade & Basic Gray stamp pads
Accessories: Stamp-a-ma-jig, Lace Ribbon Border punch, Big Shot & Ovals die, Very Vanilla 1/8" taffeta ribbon, Stampin' Dimensionals, 2-Way Glue pen

I stamped the stem first on my vanilla oval. To create a "border" for my vanilla oval, I die cut an oval using Basic Gray CS, cut it in half lengthwise, and then adhered the two pieces to either side of the back of the vanilla oval. On a scrap piece of vanilla, I stamped two flowers; first the more solid flower image in Calypso, then using my Stamp-a-ma-jig I stamped the more detailed flower image in RH Red over the Calypso. What a gorgeous combination, suggested by my trusty Color Coach! I then cut the flowers out, and adhered the shorter flower right to the CS and used Dimensionals to pop up the taller flower. I threaded the ribbon through the punched border, tied a knot, and then adhered it to my card base using the glue pen. Then I popped the whole flower oval to my card front using Dimensionals, and finished it off by stamping the greeting with Basic Gray.

Now I'd better get ready for bed, so I'm all rested for my next round of branch picking tomorrow. Hope you have a sweet weekend!

Sunday, July 17, 2011

For the Newlyweds

It is SO hot and humid here in west central Minnesota that I've been stuck inside most of the weekend. With the heat index up in the 100's, nobody should be outside unless they absolutely have to. Even though I have a lot of yard work to do, I haven't minded being inside as it's given me a chance to play with some of my new stuff!

I mentioned in my last post that I had been the pianist at my nephew Dan's wedding last weekend to his beautiful Sami. The newlyweds have been on their honeymoon this last week in northern Minnesota, and once they get their stuff packed up Sami will be moving out to Montana, where Dan has been living and working as an electrician for the last year. I wanted to send them something in the mail to their place in Montana as a kind of "welcome home," especially for Sami, who will be moving far from where she grew up for the first time in her life.

The colors they chose for their wedding were gray and bright yellow. When I first heard that, I thought "What kind of a color combo is that?" I have to admit it looked very nice, with the girls in their dark gray dresses carrying yellow flowers, and the guys in their gray tuxes with yellow ties. I used those colors in my newlywed card which features a new stamp set, Occasions Alphabet, that I earned for free as part of Sale-A-Bration! I can see myself getting a lot of use out of this set, as the 26 letters of the alphabet are paired with such great little sayings. I also used the oval frame from the new Designer Frames embossing folder set - love those two new mini folders!! I tried to keep it clean and simple, as that is Sami’s style.

Recipe
Stamps: Occasions Alphabet
Paper: Basic Gray textured, Daffodil Delight & Whisper White cardstock
Ink: Basic Gray
Accessories: Big Shot, Designer Frames & Elegant Bouquet embossing folders, 2"x1-3/8" XL oval punch, Basic Rhinestones, Stampin' Dimensionals

I hope this gives Sami a little lift in case she's feeling a little lonely in her new home. Gosh, I have to find out when her birthday is so I can make sure to get her on my list. Come to think of it, I don't think I even have their mailing address yet! Better go and give my sister a call so I can get this in the mail tomorrow. Good night, sleep tight, and sweet dreams!

Wednesday, July 13, 2011

Watered Melon!

Gosh, it's been a long time since I've been here! The last few weeks have been busy, what with the Independence Day holiday and then my nephew's wedding the following weekend. I was honored to be the pianist at the wedding, so of course that meant a lot of practice time last week. It was a beautiful wedding, and although the temperature was in the 90's and the reception hall wasn't air conditioned, the beverages were cold and the memories priceless!

A lot of experiementation was involved in the making of this card, and it seemed like it took FOREVER to finish. I dyed the Stampin' Up! Organza ribbon by dipping it in a mix of water and Melon Mambo ink refill; that was a lot of trial and error before I was finally satisfied with the result. Then I experimented with using a long length of cardstock punched out with a border punch and clipping it in order to "bend" it around the outer edge of the oval centerpiece. It's not perfect, but I'm rather pleased with how it turned out. I also made myself open up and finally use the Vintage Trinkets that I've been hoarding for a while now!

Recipe
Stamps: Simply Soft (hostess), Petite Pairs
Paper: Basic Gray textured and Whisper White CS, Neutrals Patterns Designer Series paper stack
Ink: VersaMark, Melon Mambo ink refill, Old Olive & Daffodil Delight markers
Accessories: Big Shot, Originals Ovals die, Scallop Trim border punch, 1-1/4" & 1-3/8" circle punches, 1/16" circle handheld punch, Vintage Trinkets, Organza ribbon, Black embossing powder, Neutrals Watercolor Wonder crayons, Aquapainter

I stamped the flower image in VersaMark, sprinkled the embossing powder on and heat set it. I colored the flower petals with the Aquapainter using the dye that I used on the ribbon. I ended up coloring outside the lines, which is why I added the gray "shadows" around the flowers hoping to camoflauge my mistake! (Unfortunately, you can see it if you look close.) The stems and leaves were colored with marker, and there IS Daffodil Delight in the flower stamens (is that what they're called??) Anyway, hope you like my Watered Melon experiment!

Friday, July 1, 2011

It's HERE!!

The new Idea Book & Catalog 2011-2012 is now available! Click on the link on the right to view this beautiful catalog in all its' glory...I'm sure you'll soon be drooling over all the exciting new products and accessories!
 
JOIN THE FUN!!
Stampin' Up's Starter Kit is offered starting today at just $99!! (Valued at $180) If you have ever considered becoming a Stampin' Up! Demonstrator, now is the time to begin and start saving! On your very first order of $150 or more (placed within 45 days of sign-up) you will receive a 30% discount. After that, your discount is always 20% and you get to order during premiere periods ahead of customer availability.
Here is what the Starter Kit Contains: (You MAY substitute a similar item of equal or lesser value)
  1. Easy Events Clear-Mount Set - *NEW* (123225)
  2. Pennant Parade Wood-Mount Set - *NEW* (122740)
  3. Old Olive Classic Stampin' Pad - (102277)
  4. Pumpkin Pie Classic Stampin' Pad - (105216)
  5. Real Red Classic Stampin' Pad - (103133)
  6. Basic Black Classic Stampin' Pad - (101179)
  7. Brights 8-1/2 x 11" Assorted Card Stock (119706)
  8. Whisper White Note Cards (Qty. 20) - (107311)
  9. Just Add Cake Designer Series Paper - *NEW* (124339)
  10. Chocolate Chip 1/2" Scallop Dots Ribbon - *NEW* (124142)
  11. Blender Pen (Qty. 1) - (122129)
  12. Clear-Mount Block C - (118486)
  13. Snail Adhesive - (104332)
You also receive business supplies including: Getting Started DVD & Guide, Guest Invitation Postcards, 2011-2012 Idea Book & Catalog (Qty. 8), Stampin' Up! vinyl logo, Decor Elements applicator and MORE!
 

Plus, join in July and get a FREE Christmas Keepsake project kit--a $40 value! Imagine an afternoon spent chatting with friends while creating something beautiful--isn't that what Stampin' Up! is all about? But act now because this special kit is only available as part of this limited-time offer. As an added bonus, first-time demonstrators can get two free months of Demonstrator Business Web Services (DBWS) when they sign up during their first 21 days as a demonstrator. Subscribing to DBWS means having your own online store, blog, hostess portal, and much more!

Join Stampin' Up! in July and get brand-new products, including an exclusive project kit--all for just $99! Download the starter paperwork now!  Click here to go to my Stampin' Up! website and get started by clicking the "Join The Fun" tab at the top of the page!

Thursday, June 30, 2011

Wonder What's New?

The new Stampin' Up! Idea Book & Catalog 2011-2012 goes live tomorrow, and I am so excited! My Wish List is already WAY too long because there's so many stamp sets and accessories that I'm dying to get. I'm especially excited about the new ribbon choices and the many colors they're available in! Now comes the hard part, though...whittling my list down to the point where I won't have to get a second job to pay for everything!

This card features one of the new hostess sets, Simply Soft. Stampin' Up! has changed their hostess program up a bit; now you earn hostess dollars based on the total of your workshop, and there are specially-priced hostess sets that you can spend your dollars on. If you don't like any of the hostess sets, you can use your dollars on anything else in the catalog instead. For example, a workshop total of $400 will earn you $65 in hostess dollars, plus you can get a full-price item at 50% off! This new system offers more options for the hostess, and you won't be limited to choosing a Level 1, 2 or 3 set anymore.

I am also using one of the new In Colors, Wisteria Wonder. I love, love, love this new color! If you were a fan of the retired Almost Amethyst like I was, this new color is just a shade darker, and as you can see, it coordinates beautifully with Elegant Eggplant.

Recipe
Stamps: Simply Soft, Fabulous Phrases
Paper: Wisteria Wonder, Elegant Eggplant, and Whisper White cardstock
Ink: Elegant Eggplant & Wisteria Wonder stamp pads, Lucky Limeade marker
Accessories: Big Shot, Square Lattice embossing folder, Scallop Circle & Clear Circle Bigz dies, Scallop Oval & Large Oval punches, wire clip, Organza ribbon, Basic Pearl, Stampin' Dimensionals

I experimented with a different ribbon treatment on this card, and I really like how it turned out. I first slid the clip on the left side of the scallop greeting, leaving it hanging off the side a bit. Then I tied a somewhat loose double knot in the ribbon, keeping it poufed out a bit, and then threaded the long end through the clip and attached it with adhesive on the back left side of the scallop circle. Then I adhered the scallop greeting to the card front with dimensionals, making sure the ribbon was stretched fairly tight from the left. What do you think?

Tuesday, June 21, 2011

Retired x 2

This is one of those projects that didn't turn out at all close to what it started out to be! Does that ever happen to you? My son hadn't gotten a Father's Day card for his dad, so I of course offered to make him one. The trouble is, my husband Butch has gotten so many homemade cards over the years that it's hard to come up with something that will still impress him! I used the Happy Father's Day greeting from the set All Holiday, which is retiring at the end of this month. "Perfect," I thought, "to use a retired stamp set for a card for a retired guy!" 
So I went through my trusty binder of card sketches, and thought that SC332 might work. Then I started going through my patterned papers, hoping that a color scheme might jump out at me. A half-hour later I was still waiting for inspiration to strike, and out of desperation just chose to use Basic Gray as a starting point since my husband has gray hair. Real technical, huh? I didn't like any of the color combos suggested by the Color Coach, so chose to use Night of Navy and Cherry Cobbler because I thought they both looked good with the gray. With the hard part done, I thought the card would come together like a breeze. Wrong! First the size of the stamp didn't work with the sketch, so I scrapped that and ended up with this! Once I got the papers cut and adhered, and the image stamped and layered and popped on, I found I had another problem: how to fill up the rest of the space! I happened to have some silver stars still lying around from my graduation cards, so I cut some more out of the navy and cobbler and scattered them around.

The funny thing is, this card must have been fated to turn out this way! On Sunday when my husband opened his present from Jayson, I had to laugh when I saw that it was a red, white & blue patriotic-themed fleece throw that Jayson had made in school. The card coordinated perfectly with the throw, and Dad loved them both!

Recipe
Stamps: All Holidays (retiring this month!)
Paper: Basic Gray, Night of Navy, Cherry Cobbler, Whisper White & Brushed Silver cardstock; Night of Navy and Cherry Cobbler patterned paper (Regals Collection)
Ink: Night of Navy & Cherry Cobbler markers
Accessories: Stars #2 Original Die, Big Shot, silver brad, Stampin’ Dimensionals

Isn't the throw just gorgeous? Butch is actually planning to hang it on the wall where he can admire it all the time. Jayson did a fantastic job!

Wednesday, June 15, 2011

4 You...Purseonally!

Since I haven't had enough free time lately to create new stuff, and I'm waiting on pins and needles for my new catalog preorder to arrive, I thought I'd post some of my "old" favorites. This card is for you, LaRayne! She loves purses, and when she saw this she requested that we make it at Stamp Club. Unfortunately it just never fit into any of my themes, so I'll share it here.

Recipe
Stamps: Tiny Tags
Paper: Pretty in Pink, Chocolate Chip & Very Vanilla cardstock; Sending Love Specialty Designer Series paper (retired)
Ink: Chocolate Chip
Accessories: Perfect Polka Dots embossing folder; Top Note bigz die; Big Shot; Jewelry Tag, 1-3/4" & 1-3/8" circle, and 1-3/4"x7/8" oval punches; Paper Piercing Tool; Gold brad; Stampin' Dimensionals; white thread

This is SO easy to make! First I ran a couple quarter sheets of Choc. Chip cardstock through the Big Shot in the embossing folder. Then I ran one of the embossed pieces through the Big Shot using the Top Note die, and then cut that in half to create the purse. I used the oval punch for the purse clasp, cutting about 1/4 off, and then punched a hole with the Paper Piercing Tool and inserted the brad to create the clasp closure. The clasp is popped up with Dimensionals. The purse handle was made with the circle punches, first punching the smaller circle out of the embossed cardstock, then centering that in the bigger circle and punching it out, and finally adhering it behind the purse. I then stamped the "4 You" on the vanilla cardstock, punched it out with the Jewelry Tag punch, pierced a hole and tied it to the handle with plain old sewing thread. Easy Peasy Purse!

Hope you enjoy the rest of the week; hopefully I will see you again in a few days! Sweet dreams!