Sunday, February 10, 2013

Blowing Snow sends my Hearts A Flutter!


We're in the midst of a snowstorm here in west central Minnesota, so it's the perfect time for me to finally do some updating on my blog. My "real" job has kept me very busy the last few months, leaving me little time (or energy) to even think about stamping. Things are finally slowing down enough that I've actually had a few free weekends to re-organize my craft room, and even do some stamping! It took a while for me to find my mojo after such a long time away, but I found a lot of inspiration in the new Spring Catalog! It's also sale-a-bration (SAB) time, which means awesome products available for FREE (with a $50 order)!!

Here's a non-traditional CAS (Clean And Simple) Valentine's card, featuring products from both the Spring and SAB catalogs. I apologize for the poor picture; as you can imagine, there's not much natural light in the middle of a snowstorm, so the picture is not the best quality.

Recipe:
Stamps: Netting background, Friendly Phrases
Paper: Whisper White, Sycamore Street Designer Series Paper (SAB)
Ink: Sahara Sand, Island Indigo
Accessories: Hearts a Flutter Framelit Dies & Big Shot, Occasions Paper-Piercing Pack (Spring), paper-piercing tool and mat, Large Oval punch, Stampin' Dimensionals, Stamp-a-ma-jig

I just love the color combinations in the Sycamore Street DS paper: Whisper White, Sahara Sand, Tangerine Tango, Island Indigo, Pool Party, Rich Razzleberry and Starfruit. I made a mask by punching an oval out of a Post-It Note, and adhered it to my white rectangle before stamping the Netting background in Sahara Sand. I then used the Stamp-a-ma-jig to help me line up the phrase exactly where I wanted to stamp it. I pierced around the oval using the Occasions Paper Piercing Pack, adhered the small pennant to the back side of the front rectangle, and then used Stampin' Dimensionals to adhere the rectangle to my card base. I then pierced around the small pennant, and applied the heart using a Dimensional. This was a quick card, and I know my sons will appreciate it because it's not red and mushy!

I've got lots more cards to share, so stop back and see me. Until then, sweet dreams!

Wednesday, October 3, 2012

Back from Vacation!

Yes, I'm back! Did you miss me? After being a Stampin' Up! demonstrator for over 10 years, I felt I needed to take some time away from stamping this summer to get some long-overdue projects done in preparation for our youngest son's high school graduation next June. Although I'm still doing in-home workshops, my stamp club is on hiatus for a year while I concentrate on my home and family for a while.

I did manage to carve out some time for stamping, though, and am sharing a card made for a coworker's summer birthday. This card features the first stamp set that went on my wish list when I saw the new catalog...Serene Silhouettes.

Recipe
Stamps: Serene Silhouettes, Itty Bitty Banners
Paper: Rich Razzleberry, Crumb Cake, Midnight Muse, Whisper White
Ink: Midnight Muse, Bashful Blue, Daffodil Delight, Tangerine Tango
Accessories: Paper Doily Sizzlits L, Bitty Banners Framelits, Big Shot, Stampin' Sponge wedges, Basic Pearls, Stampin' Dimensionals

Since my coworker has a camper near a lake in the summer, I knew she would appreciate this sponged sunset on the lake scene. I first masked off the top portion of the card to sponge the blue, then masked off the bottom portion to sponge in the sun and sky. Then I stamped the tree image along the sides, and along the bottom of the card stamped just the top portion of the trees to give the look of bushes. I think it turned out to be a very relaxing summer scene. What do you think?

Hope you're enjoying this beautiful Minnesota fall weather...I certainly am! Until next time, sweet dreams!

Sunday, May 20, 2012

Soft Sympathy

When recently asked to create a sympathy card for a coworker whose baby girl was stillborn, I was a little unsure of what "type" of card to make. However, my stamp club had just met and we had made a wedding card (using all white) using this layout. By using pink instead and embellishing with small pearls, I hope I hit the right blend of soft sympathy that I was trying to achieve.
 
Recipe
Stamps: Bordering on Romance, Petite Pairs
Paper: Pink Pirouette, Whisper White
Ink: Basic Black, Pink Pirouette & Certainly Celery markers
Accessories: Big Shot; Elegant Bouquet & Designer Frames embossing folders; Labels Collection Framelit Dies; XL Oval punch; White taffeta ribbon; Basic Pearls; Stampin' Dimensionals; Mini Glue Dots

I found it is much better to die cut the Framelit label and then run it through the Big Shot in the Designer Frames embossing folder. I first tried it the opposite way, but the embossed dots on the Designer Frame were flattened when I ran it through to die cut the Framelit. The ribbon is just tied in a bow and attached with a glue dot.

Saturday, April 28, 2012

Time to say Goodbye

Sadly, this is the time of year when we have to say "Goodbye" to the items retiring from the annual catalog, because the NEW CATALOG is coming out a month earlier this year - June 1!! It's always sad to say goodbye, but keep in mind that the retiring items are leaving in order to make room for even more new and exciting products!

So, you'll need to get the retiring items before they are gone! The retired accessories and Definitely Decorative (including Décor Elements) lists are now available and won't stay around for long--these items are only available while supplies last, and some are even discounted from 25% up to 70% off!  If you haven't completed your collection of the 2010-2012 In Color ink pads, card stock, markers, refills, or ribbon, you'll want to get them NOW.
 
When you look at the retired accessories list, you'll note that all of the Stampin' Pads are listed -  but don't let it scare you! They are listed for two reasons: (1) Craft Stampin' Pads will now only be available in black and white; and (2) Stampin' Up! is introducing a new Firm Foam pad in our Classic Stampin' Pads with the 2012-2013 annual catalog. The Firm Foam pads offer better ink coverage and, in turn, better stamped images.

Five ink colors have undergone formula changes to improve functionality and color stability with the new firm foam pads. These colors are:
  • Basic Black
  • Basic Gray
  • Marina Mist
  • Perfect Plum
  • Tempting Turquoise
All five colors of the reformulated inks have been fully tested and approved. While using the new ink formula in the old Stampin’ Pads is fine, Stampin' Up! does not recommend using the old ink formula in the new firm foam pads. Any refills purchased after April 30, 2012, will contain the new formulated ink.

Some other things to note:
  • Stampin' Write Markers will only be available in select individual colors, although they will still be offered in color collection assortment packs.
  • 12" x 12" Textured Card Stock will no longer be offered.
  • 12" x 12" Smooth Card Stock will only be available in select individual colors and color collections assortment packs.
I am SO EXCITED to see what Stampin' Up! has in store for us in the new catalog, and will have a hard time waiting until June 1st. However, I HAVE gotten a sneak peak at some of the new products, and will be sharing them with you soon!

Thursday, April 26, 2012

Blossom Butterfly

Wow...I blinked, and it's already the end of April. Just a reminder that items in the Occasions Mini Catalog are only available through the end of this month, so place your orders now! Speaking of the mini catalog, here's a card that Stamp Club did last month which features the fantastic Blossom Punch and the beautiful Attic Boutique Designer Series Paper.

Recipe
Stamps: Teeny Tiny Wishes
Paper: Whisper White, Pool Party & Soft Suede smooth CS; Whisper White textured CS; Attic Boutique Designer Series Paper (mini catalog)
Ink: Soft Suede
Accessories: Blossom Punch (mini catalog), Scallop Trim border punch, Large Oval & Scallop Oval punches, Itty Bitty Shapes Punch Pack, Antique Brad, Basic Pearls, Stampin' Dimensionals

Monday, March 26, 2012

Fresh Vintage Doily

I think I jinxed myself when I stated in my last post that things would slow down. Between work, the flu bug, work, the busy Lenten church season, work, and - oh yeah - stamp workshops, it's pretty obvious that I've been unable to post in the last few weeks. It's already the last week in March and Sale-A-Bration will be ending in a few short days! Yikes!

So here's a card we've been making at my workshops, which incorporates my favorite SAB set, Fresh Vintage, with my favorite Occasions Mini Catalog item, the Paper Doily die.

Recipe
Stamps: Fresh Vintage (SAB), Petite Pairs
Paper: Very Vanilla, Crumb Cake, and Naturals Ivory card stock
Ink: Crumb Cake pad (card 1); Melon Mambo, Old Olive & Elegant Eggplant markers (card 2)
Accessories: Big Shot & Paper Doily die, Basic Pearls

You will have to experiment when using your Paper Doily die, as it may require the use of extra "shims" or layers when making your Big Shot sandwich. I found that I needed to use an extra piece of colored cardstock as a shim layer or the smaller pieces would not punch out cleanly from the doily. This could vary depending on individual Big Shots, so don't give up if your first Doily does not punch cleanly. Be patient and persevere - it's definitely worth the extra trial and error!

That's all the time I have for now, but I'll try very hard to carve out more time later this week to share some more Sale-A-Bration inspiraton! Sweet dreams!


Sunday, March 4, 2012

Tea Shoppe Wishes

Just a quick post to let you know that I am still here, just very busy lately! I was asked to create some gift-type cards for a "Tea Party" at a local church, so I've been playing around with the wonderful Tea Shoppe set in the Occasions Mini Catalog. This set wasn't originally on my Wish List, but I'm glad I was asked to create something with it, as I think it is a set I will be using quite often! This is a card I made for one of Jayson's teachers, who happens to love coffee. I CASEd the layout from fellow blogger Debra Currier.

Recipe
Stamps: Tea Shoppe, Bring on the Cake
Paper: Whisper White, Soft Suede & Baja Breeze CS; Attic Boutique DS paper (mini catalog)
Ink: Soft Suede
Accessories: Big Shot, Perfect Pennants die & Square Lattice embossing folder; Itty Bitty Shapes Punch Pack; 1-3/4" Circle punch; Basic Rhinestones; Stampin' Dimensionals

The three small cup images come on one piece of rubber, but I cut them apart so I could use them separately more easily; that's one of the things I love about the clear-mount stamps - you don't need to try to find extra wood to mount your stamps on if you wish to mount them differently.

That's all the time I have for right now; things should be slowing down in the next few days so I hope to be posting more regularly again. Sweet dreams!

Saturday, February 4, 2012

Be My Origami Valentine

I honestly don't know where the time goes sometimes; Valentine's Day will be here before I know it! Here's another project that my stamp club did last month. It's a funky fold project, meaning that it's a project that uses unique folds instead of the standard side-fold or tent-fold. This Origami Diamond Fold was actually a very easy project to complete using the new Simply Scored Scoring Tool, available in the mini catalog.

Recipe
Stamps: Delightful Dozen, Sprinkled Expressions (sale-a-bration)
Paper: Twitterpated Designer Series Paper (mini catalog); Basic Gray, Real Red & Whisper White CS; Red Glimmer Paper
Ink: Real Red, Basic Gray
Accessories: Simply Scored Scoring Tool; Big Shot & Perfect Pennants die; Decorative Label, 1-3/4 Circle, Full Heart & Small Heart punches; Whisper White 3/8" taffeta ribbon; Stampin' Dimensionals

There is a wonderful tutorial of this funky fold project here. However, I did make some changes to the scoring lines so that the origami pocket would be centered on the project, and scored at 3-1/4", 5-1/2", 10" and 12-1/4".

Hope you enjoyed this funky project! I'll be sharing some treats next week, so hope to see you then. Sweet dreams!

Saturday, January 21, 2012

Twitterpated!

Well, I survived birthday week, but just barely! My youngest son turned 18 recently, and it was very hard for me...the realization that he is now an adult somehow made me feel SO much older. Probably because now that he IS considered an adult, we have to take special steps to protect him, as he could be considered a vulnerable adult due to his autism spectrum disorder. Needless to say there is lots of paperwork involved in that protection, which is why I've been absent from blog land for a while.

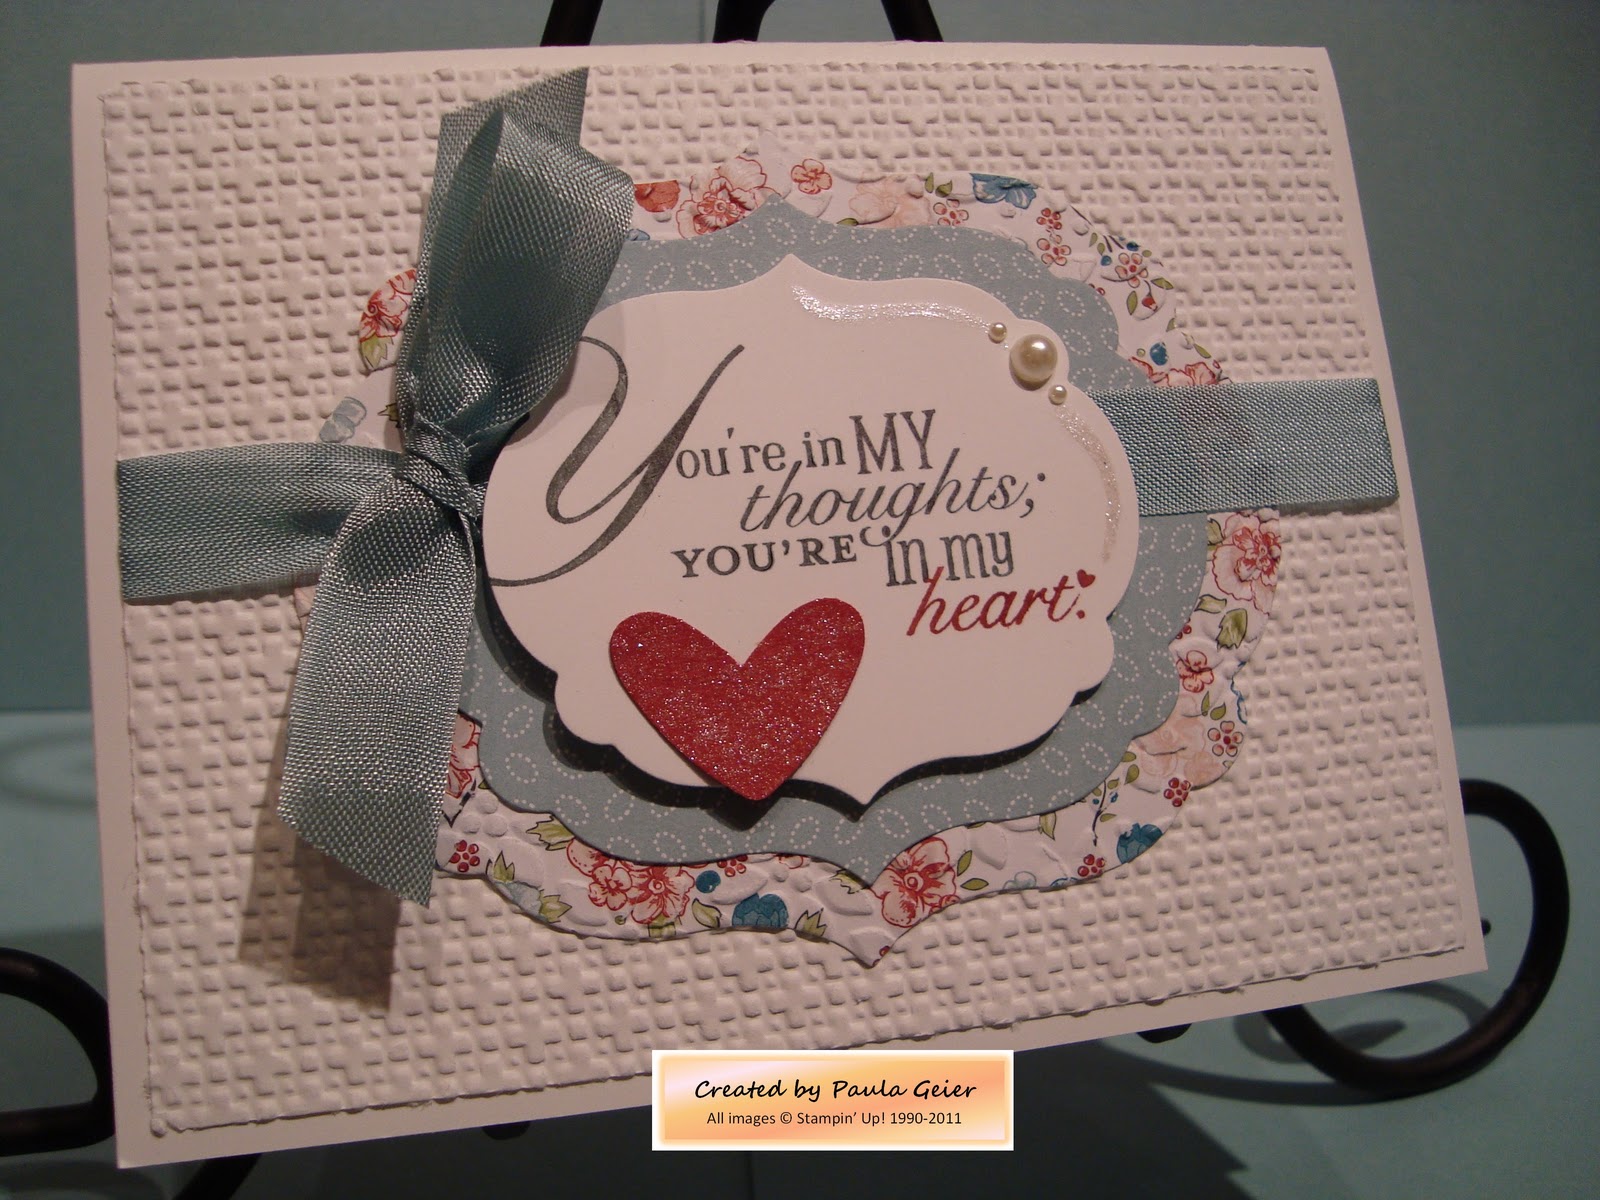
But now that I'm back, I'm going to share one of the projects my stamp club did this week. Our theme was "It's All About Hearts!" in preparation for Valentine's Day. This card, however, was not the one I had originally planned for the club. My mom, who is a club member, came over to celebrate birthdays (my oldest son also turned 29) two days before the club was to meet, so she made her projects then. Unfortunately the original Smooch Spritz project I had planned turned out to be not very club-friendly, so I had to make a last-minute change. Thankfully I had this wonderful layout in my head, as I had just seen it on the talented Chris Smith's blog. Thanks for the inspiration, Chris!

Recipe
Stamps: Word Play
Paper: Whisper White & Riding Hood Red CS, Twitterpated Designer Series Paper (mini catalog)
Ink: Basic Gray & Riding Hood Red markers
Accessories: Square Lattice & Petals-a-Plenty embossing folders & Big Shot; Baja Breeze Seam Binding Ribbon; Framelits Dies Labels Collection; Heart to Heart punch; Vanilla Shimmer Smooch Spritz; Illuminate Top Coat Smooch Pearlized Accent Ink; Basic Pearls; Stampin' Dimensionals

I just LOVE the new Framelits Dies in the Occasions Mini catalog! They are so easy to use, and with six different sizes to choose from there are endless layout possibilities. The colors in the beautiful Twitterpated Designer Series paper are some of my favorites, and of course they coordinate so well that this card practically made itself! The embossing folders add interesting texture, and the Smooch products add just the right amount of glimmer. I hope you can see in the close-up how I "painted" with the Illuminate accent ink along the top right edges of the greeting layer. You may also be able to see how the flowered paper is embossed with the Petals-a-Plenty folder. This card is very versatile, and could be used for many occasions such as an anniversary, "thinking of you" or even a birthday or sympathy card. 

The cold wind is really blowing the snow around outside my dark window, so I'm looking forward to climbing into bed under some warm blankets. Sweet dreams!

Saturday, January 7, 2012

Jolly Bingo Birthday!

It's time to get back to work now that the holidays have come and gone. I hope everyone had a memorable Christmas and is enjoying the new year! During the next six weeks my family will be celebrating over 10 birthdays, so I really have to buckle down and get some serious stamping done.

Tonight I'm giving you a sneak peak of some of the new products available for FREE during the upcoming Sale-A-Bration, which starts January 24. It's a birthday card, of course! I've been wanting to use this neat layout ever since I saw it; it's borrowed from the very talented Mary Brown (aka stampercamper). The stamp set I'm using is actually a Christmas set called Jolly Bingo Bits, but it is so versatile that it can be used all year long.

Recipe
Stamps: Jolly Bingo Bits, Fabulous Phrases
Paper: Pool Party, Calypso Coral & Whisper White CS; Everyday Enchantment DS paper (SAB)
Ink: Pool Party, Calypso Coral, Lucky Limeade & Basic Gray
Accessories: Tasteful Trim die & Big Shot; Everyday Enchantment Ribbon & Brad Pack (SAB); Basic Rhinestones; 1/16" circle punch; Paper Snips; Stampin' Dimensionals

Isn't this a fun layout? The Pool Party card base is cut 3-1/4" x 11" and folded in half, allowing the greeting layer to hang over the edge for just an extra pop of interest. The ribbon bow is also done using Mary Brown's technique, but since the organdy ribbon is thin I wrapped it three times around a cardstock scrap, then carefully slid it off and inserted it in the opened brad, then closed the brad and popped it through the greeting layer. The greeting layer is popped off the base using Dimensionals.

I just love the Everyday Enchantment DS paper and matching accessories; the color combinations are really fresh and I know you'll love the patterns as much as I do! As much I'm looking forward to Sale-A-Bration, though, I'm even more excited about the Occasions Mini Catalog, which went live on January 4th. It is chock full of exciting new products and stamp sets - so many wonderful things that I'm having a hard time trying to talk myself out of just ordering everything in the catalog!! You'll be seeing me use some of those new products here in the coming weeks, so check back once in a while.

Time now for me to head off to bed, where I hope I can dream up some more sweet birthday layouts. G'night!

Monday, December 19, 2011

Let it snow, let it snow...

Only six days until Christmas, and we have no snow here in west central Minnesota. I don't like it. I don't mind the mild temperatures, but it sure would be a lot prettier with all the brown covered up by an inch or two of that sparkling white stuff! In my humble opinion, it's just not Christmas in Minnesota without snow. So, tonight I'm posting this card to help remind me of what snowflakes look like.

Recipe
Stamps: Teeny Tiny Wishes
Paper: Whisper White & Bashful Blue
Ink: Bashful Blue
Accessories: Northern Flurry embossing folder & Big Shot; Modern Label & Large Oval punches; Basic Rhinestones; sponge wedge, Stampin' Dimensionals

This is a super easy card to put together! Using the sponging technique, I lightly brushed an inked-up sponge wedge over the raised portions of the design to bring out the snowflake images. Then I lightly sponged around the snowflakes to give the background some depth.  I finished it off by popping the greeting up on Dimensionals and adding a couple of sparkly rhinestones.

Friday, December 9, 2011

Bright Hopes for Christmas

Only 16 days until Christmas! Time is flying by way too fast. Are you ready? If you don't have your Christmas cards started yet, here's another idea for you. This is another one of the sets that caught my eye immediately when I first saw the Holiday Mini Catalog. I just love the elegant look of the scrollwork images, and the style is similar to that of Norwegian rosemaling - another art form I really love!

Recipe
Stamps: Bright Hopes
Paper: Crumb Cake, Always Artichoke, Cherry Cobbler
Ink: Always Artichoke craft Stampin' Spot
Accessories: Iridescent Ice embossing powder & heat tool, Snow Burst embossing folder (Mini catalog) & Big Shot, piercing tool, Clear Rhinestone brad, Cherry Cobbler Seam Binding Ribbon, Stampin' Dimensionals

This card is simple enough that you could easily mass-produce quite a few at one time. The Snow Burst embossing folder adds just the right background texture, and I purposely separated the wreath and greeting images, as well as adding the contrasting color layers, to give the impression of a wreath hanging on the outside of a door. The Iridescent Ice gives the wreath an icy sparkle, and of course the bow (done the easy stampercamper way) is the perfect finishing touch.

It's been a long and busy week, and I'm ready for some serious relaxation this weekend - in between finishing my Christmas shopping online and doing some more holiday decorating! Hope your weekend is just as sweet!


Tuesday, December 6, 2011

The Sounding Joy

This is the third project that my stamp club made at our last get-together. This was one of the first sets to go on my wish list when the Holiday Mini catalog came out. As an organist, Christmas is my very favorite season of the year...all those beautiful hymns sung from the heart by a congregation while the candlelight flickers throughout the church. "Joy to the World" is one of my favorite hymns, and I just love to pull out all the stops and just let the music soar! I was inspired by a lovely card made by Jen Sannes, and changed up the colors and layout to better suit my taste.

Recipe
Stamps: The Sounding Joy (Holiday Mini)
Paper:  Cherry Cobbler & Very Vanilla CS (stamp club used Shimmery White and it was beautiful!), Early Espresso textured & smooth CS; Silver Glimmer paper
Ink: Crumb Cake, Cherry Cobbler
Accessories: Big Shot, Petals-a-Plenty embossing folder, Tasteful Trim die, 3-1/2" circle die, Cherry Cobbler Quilted Satin Ribbon (mini catalog), piercing tool, Clear Rhinestone brad, Basic Rhinestones, Sticky Strip, Stampin' Dimensionals

The assembly of this card is pretty self-explanatory. The only tip I have is to use Sticky Strip to adhere the Cherry Cobbler to the Silver Glimmer paper, as regular adhesive just isn't sticky enough. I also used a dull scissor to clip off the tip of the brad that was showing on the top outside of the circle. The bow is, of course, made the stampercamper way...refer to previous posts for instructions.

That's all for tonight, as it's past my bedtime and I have a busy week ahead of me. Hope to see you again in a few days, and until then, keep it sweet!

Wednesday, November 30, 2011

Merry Giftmas!

I'm sorry to report that there was trouble in blog land last night, and due to circumstances beyond my control I was unable to get this project posted. Thankfully all is well tonight, so here we go!
 
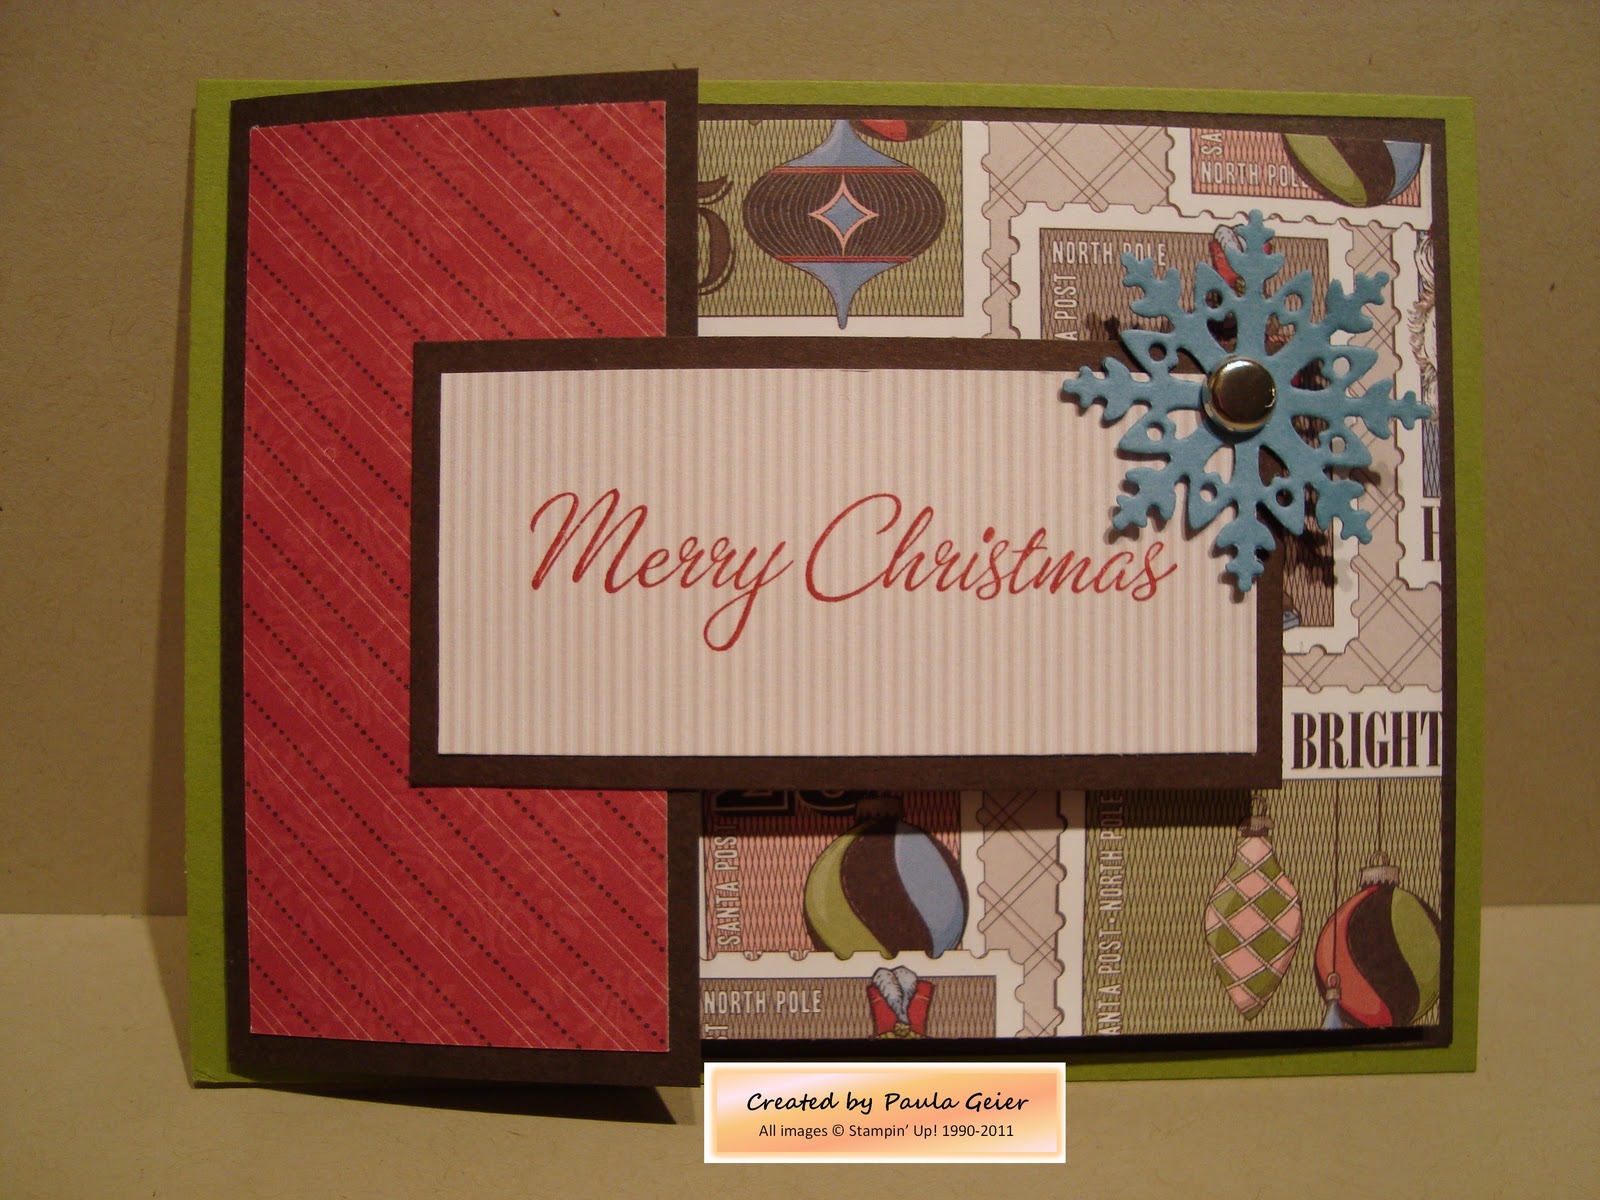
This is another project that my stamp club made last week. I don't really know how to classify this one: it's a card with unique folds that holds a gift card, so I guess I'll call it a Giftmas card!

Recipe
Stamps: Four the Holidays, Many Merry Messages
Paper: Old Olive, Early Espresso, Marina Mist & Whisper White CS; Letters to Santa DS paper
Ink: Riding Hood Red
Accessories: Northern Frost decorative strip die & Big Shot; 5/16" Jumbo Brads Neutrals; 3/4" circle punch; paper piercing tool

You will need:
  1. Old Olive CS cut to 5-1/2" x 4-1/4"
  2. Early Espresso CS cut to 7-1/4" x 4", score at 2"
  3. Whisper White CS cut to 8-1/2" x 3-3/4", score at 3-1/2"
  4. Designer Series paper (RHR diagonal stripes) cut to 3-3/4" x 1-3/4" for left front
  5. Designer Series paper (postage stamp images) cut to 3-3/4" x 3-1/2" for right front
  6. Early Espresso strip cut to 3-1/2" x 1-3/4" for front greeting layer
  7. Designer Series strip (Crumb Cake stripes) cut to 3-1/4" x 1-1/2" for front greeting
  8. Designer Series paper (Old Olive diagonal stripes) cut to 3-3/8" x 2-1/2" to hold gift card
To assemble:
  • Adhere Early Espresso piece to Old Olive base with fold at left.
  • Adhere Whisper White piece to Early Espresso piece with fold at right.
  • Adhere RHR rectangle to left front Early Espresso piece.
  • Adhere postage stamp images piece to front fold of Whisper White piece.
  • Punch a half circle out of the top of the Old Olive diagonal stripes piece and adhere to inside right of the Whisper White CS.
  • Stamp greeting on Crumb Cake stripes DS paper with Riding Hood Red.
  • Adhere greeting to strip of Early Espresso and adhere EE strip to left fold of card front.
  • Use the Northern Frost die with Marina Mist CS in the Big Shot to cut a variety of snowflakes.
  • Punch a hole in the upper right corner of the greeting strip and add your choice of snowflake to front using a brad.
  • Stamp a greeting inside your card, and you have a unique way to give a gift card! I did use Velcro dots on the back side of the greeting strip to hold the card closed.
These make great little gifts for teachers and other special people, and you can vary the Designer Series paper you use to make them appropriate for any occasion. Now go and create your own Giftmas card - well, not right this minute...unless you're an insomniac!


Friday, November 25, 2011

Telescoping Christmas

No, my computer didn't crash, and I didn't forget my blog password. Between work and taking advantage of the beautiful November weather to finish up a lot of painting both outside and inside the house, I've been very busy! To make up for those lost three weeks in blog land, I'll be posting lots of Christmas cards in the next few weeks.

The first is one that my stamp club really enjoyed making last week. It's called a telescoping card, and it's actually very easy to put together. I received some Marina Mist Scallop Dots Ribbon from my upline (along with some other goodies) as a reward for meeting a selling goal, and when I opened up the ribbon it immediately sparked the idea for this card. Using my trusty Color Coach as a guide, I paired it with Real Red and Old Olive for a unique and interactive Christmas Card!

Recipe
Stamps: Bright Hopes (Holiday Mini)
Paper: Marina Mist & Whisper White CS
Ink: Marina Mist & Real Red classic ink pads, Old Olive craft pad
Accessories: Big Shot & Scallop Circle, 3-1/2" Circle & 3" Circle dies; 2-1/2" Circle punch; Word Window punch; Iridescent Ice embossing powder; heat tool; paper piercing tool; Circle Fire rhinestone brads; Basic Rhinestones; Silver brads

You need one Marina Mist scallop circle, two 3-1/2" Whisper White circles, one Marina Mist 3" circle, and one 2-1/2" Whisper White circle. Using the Old Olive craft pad, stamp the wreath image on the smallest circle and the Christmas tree on one of the 3-1/2" circles, sprinkle Iridescent Ice embossing powder on both and then heat emboss. On the remaining 3-1/2" circle stamp the "Wishing you a season..." greeting in Real Red and the snowflakes around the outside in Marina Mist. Adhere the Christmas Tree image to the Marina Mist scallop circle and the wreath image to the small Marina Mist circle.

To assemble the card, take the 'greeting' circle, lay it upside down (so you can see the words but they are upside down) over the Christmas Tree image, pierce a hole in the 'top' center of the white circle (actually the bottom of the circle but it's upside down!) and insert a silver brad. Now you can swing the 'greeting' circle up so you can read the words. Then take the wreath circle and center it over the 'greeting' circle, punch a hole in the Marina Mist margin at the top center and insert another brad. Swing the wreath image up to add the ribbon. Fold a 4" piece of ribbon in half and punch a hole in the bottom center with the 1/16" circle punch. Using the piercing tool, punch a hole in the top center of the wreath and insert the Circle Fire brad, then push the brad through the hole in your ribbon. To 'close' the card, hold near the ribbon and swing to the right and down until the circles line up neatly inside each other. You have just made a telescoping card!

To finish off the wreath image, stamp "Merry Christmas" in Real Red on a scrap of 5/16" wide Whisper White paper. Hold your Word Window punch so you are looking at the back, insert one end of the scrap into the right side of the punch opening, and punch off the square end. Turn the scrap and finish off the other end the same way, and adhere over the center of the wreath using Stampin' Dimensionals. To add a bit more color to the wreath, I colored our basic Rhinestones using a red Sharpie marker and then adhered them in a random pattern.

Isn't this a neat idea? You could also change things up a bit and add a family photo in the bottom circle instead of the tree. I'm afraid my photos don't capture the real sparkle of the Iridescent Ice; it looks much better in real life!

Well, that's it for this week - I'll see you next Tuesday with another sweet Christmas idea!

Sunday, October 30, 2011

Mixed Up Scandinavian!

Yes, if you didn't know this before, I'm here to admit that I am one mixed-up Scandinavian.  It's Halloween tomorrow, but since I don't do cards for that holiday I'm posting a Christmas card instead!

A few weeks ago the country church I attend held a Lutefisk Supper, complete with all kinds of Scandinavian goodies and a Scandinavian Gift Shoppe. I made these Christmas cards for the gift shop and was quite pleased to have people ask me how I made them; apparently they were a big hit with those craving all things Scandinavian! I tried to keep the embellishments to a minimum in order to keep the postage cost down for those sending these out for the holidays.

Recipe
Stamps: Scandinavian Season (retired)
Paper: Early Espresso, Cherry Cobbler, Old Olive & Shimmery White CS
Ink: VersaMark, Early Espresso, Cherry Cobbler, Night of Navy & Old Olive stamp pads; Old Olive marker
Accessories: Black embossing powder, blender pens, Basic Rhinestones, paper piercing tool, Stampin' Dimensionals

I stamped the tree with VersaMark on the Shimmery White CS and then heat embossed it with black embossing powder. I colored in the tree using ink pads and blender pens. Since the Olive coloring turned out so light, I used the marker to add some shading. (Be sure to carefully blot the embossed parts after using the marker, as it tends to smear.) I added some rhinestones for sparkle, and then finished it off by piercing my paper to give it a Hardanger crochet look.

Well, that's it for tonight. Hope I see some trick-or-treaters tomorrow night...I DO have some sweet treats!

Tuesday, October 18, 2011

It's a Wrap Card!

Last week I posted a cute little Halloween treat box that used the stamp set "It's a Wrap Holidays" from the Holiday Mini Catalog. I stamped the "EEK!" from that stamp set on a mailing label and wrapped it around a Hershey's Nugget candy. Well, that set is not only for stamping on mailing labels - you can also use the images to make backgrounds or really sweet cards, like this one!

Recipe
Stamps: It's a Wrap Holidays (mini catalog)
Paper: Soft Suede, More Mustard, Pool Party & Very Vanilla CS; Spice Cake Designer Series paper
Ink: Soft Suede, More Mustard & Pool Party stamp pads
Accessories: Scallop Edge border punch, 3/4" circle punch, Glimmer Brads Basics, Spice Cake Designer Fabric, Stampin' Dimensionals

Have I mentioned yet how much I love the color combinations in the Spice Cake papers? And the matching fabric makes the perfect bow! I did the bow the Mary Brown (aka stampercamper) way and double-folded it, then clinched it up in the Glimmer Brad. I put the brad through a circle of Soft Suede and mounted it to the card front using a Dimensional. Isn't it cute?

Well, that should wrap it up for tonight...have a sweet one!

Saturday, October 8, 2011

Sweetly Scary

I have a confession to make: I'm not a big fan of Halloween. Yeah, I like handing out candy to the neighborhood kids when they come by in their scary-cute costumes. But as for making cards celebrating the holiday? Nope, just don't see the reason. But since I do like to hand out candy, it stands to reason that I like to come up with interesting ways in which to wrap that candy!

This is the last of the three projects made by my Stamp Club last week. It's a simple Halloween treat box filled with Hershey Nuggets. Of course I didn't have any Halloween Designer Series paper, but the Well Worn packet had the perfect substitute.

Recipe
Stamps: Grateful Greetings, It's A Wrap Holidays (mini catalog)
Paper: Basic Gray, Cajun Craze, Well Worn Designer Series paper, mailing labels
Ink: Basic Gray, Cajun Craze
Accessories: Big Shot & Bitty Box die, 8-blossom punch from Itty Bitty Shapes Punch Pack

Tuesday, October 4, 2011

"There's Always Something...

for which to be thankful." I love that quote by Charles Dickens, and it's the main reason (well, okay, I loved the images too!) that I ordered the Always Thankful set in the Holiday Mini Catalog. Being the parent of a special needs child means that your whole concept of a normal life changes. You learn that even though there may be things your child is unable to do, there are so many others that he excels at. You learn that you don't need all those things you once thought you needed in order to be happy. You celebrate the small victories, and you realize that each new day brings another opportunity for growth. Yes, Jayson has Asperger's, but he doesn't have brain damage. We are all healthy. I have three different jobs, and I love them all. I have family and friends that I know I can count on to be there when needed. There is ALWAYS something for which to be thankful!!

This is the other card that my Stamp Club made last week. In keeping with the theme that "It's All About the Paper!" we used two more of the patterns from the gorgeous Spice Cake patterned paper. We also incorporated the matching Spice Cake fabric into the card - love that stuff! It's so easy to work with, and you get quite a bit of material in 3 different patterns/colors - those fat quarters are pretty fat!

Recipe
Stamps: Always Thankful
Paper: Spice Cake Designer Series paper; Soft Suede, Pool Party & Vanilla CS
Ink: Basic Black, More Mustard & Pool Party stamp pads; River Rock & More Mustard markers
Accessories: Spice Cake Designer Fabric; Scallop Oval, Modern Label & 1-3/8" Circle punches; Mini Library Clips; Blender Pens; Stampin' Dimensionals

The wheat image was stamped with Basic Black. I then made a "pool" of color on the inside top of my stamp pad case by repeatedly pressing the top down into the pad and then opening the case. I used a blender pen to pick up ink from that pool to color the image, which enables you to shade the image as you desire. I used the MM marker add some deeper shading to the wheat, and colored the grass with River Rock. The quote was stamped on vanilla CS, then punched out with the oval punch. I punched a circle out of Soft Suede and adhered that to the back of the oval. I punched another piece of Soft Suede with the Modern Label punch and then cut that piece in half, and adhered one half to each side of my quote behind the circle. I finished it off by clipping a short piece of fabric in the Library Clip and clipping it to the quote, then added Dimensionals to the back and adhered it over the fabric strip running along the right third of the card. To adhere the fabric strip, I simply ran adhesive from top to bottom along the right edge of the brown patterned paper, then simply stuck the fabric to the adhesive. Easy peasy!

Well, I'm thankful that I finished this post and can now go to bed. What are you thankful for? Remember, there's always something!!